How to Partition and Formate the hard disk and install windows XP Using Windows XP Setup Programe

Author: Tom4u // Category: , ,
How to formate the ahrd disk and Insatll windows XP using windows XP setup programe. Here some steps are given below wich is help you to install windows XP.

Step 1: Partition the hard disk
a. Insert the Windows XP CD into your CD or DVD drive, or insert the first Windows XP Setup disk into the floppy disk drive, and then restart the computer to start the Windows XP Setup program.

Note If you are using the Windows XP Setup disks, insert each additional disk when you are prompted, and then press ENTER to continue after you insert each disk.
b. If you are prompted, select any options that are required to start the computer from the CD or DVD drive.
c. If your hard disk controller requires a third-party original equipment manufacturer (OEM) driver, press F6 to specify the driver.
d. At the Welcome to Setup page, press ENTER.

Note If you are using the Setup disks (six bootable disks), the setup prompts you to insert the Windows XP CD.
e. Press F8 to accept the Windows XP Licensing Agreement.
f. If an existing Windows XP installation is detected, you are prompted to repair it. To bypass the repair, press ESC.
g. All existing partitions and non-partitioned spaces are listed for each physical hard disk. Use the ARROW keys to select an existing partition, or create a new partition by selecting the non-partitioned space where you want to create a new partition. You can also press C to create a new partition using non-partitioned space.

Note If you want to create a partition where one or more partitions already exist, you must first delete the existing partition or partitions, and then create the new partition. You can press D to delete an existing partition, and then press L (or press ENTER, and then press L if it is the System partition) to confirm that you want to delete the partition. Repeat this step for each existing partition that you want to include in the new partition. When all the partitions are deleted, select the remaining non-partitioned space, and then press C to create the new partition.
h. To create the partition with the maximum size, press ENTER. To specify the partition size, type the size in megabytes (MB) for the new partition, and then press ENTER.
i. If you want to create additional partitions, repeat steps g. and h.
j. To format the partition and install Windows XP, go to step 2.

If you do not want to install Windows XP, press F3 two times to exit the Windows Setup program, and then do not follow the remaining steps in this post

To format the partition without installing Windows XP, use a different utility.

Step 2: Format the hard disk and install Windows XP
a. Use the ARROW keys to select the partition where you want to install Windows XP, and then press ENTER.
b. Select the format option that you want to use to format the partition. You can select from the following options:
• Format the partition by using the NTFS file system (Quick)
• Format the partition by using the FAT file system (Quick)
• Format the partition by using the NTFS file system
• Format the partition by using the FAT file system
• Leave the current file system intact (no changes)
Notes
• If the selected partition is a new partition, the option to leave the current file system intact is not available.
• If the selected partition is larger than 32 gigabytes (GB), the FAT file system option is not available.
• If the selected partition is larger than 2 GB, the Windows Setup program uses the FAT32 file system (you must press ENTER to confirm).
• If the partition is smaller than 2 GB, the Windows Setup program uses the FAT16 file system.
• If you deleted and created a new System partition, but you are installing Windows XP on a different partition, you are prompted to select a file system for both the System and Startup partitions.
c. Press ENTER.
d. After the Windows Setup program formats the partition, follow the instructions that appear on the screen to install Windows XP. After the Windows Setup program is finished and you have restarted the computer, you can use the Disk Management tools in Windows XP to create or format more partitions.

How to disable program fixes and Program Compatibility Assistant warnings in Windows Vista

Author: Tom4u // Category: , , , ,
Programs may have program fixes applied to them to help them run without issues in a Windows operating system. However, you may want to disable a program fix on computers in your organization.

How to disable a program fix

To disable a program fix, use a test computer to determine the registry keys to create. You can then use these registry keys to disable the fix on other computers. To do this, follow these steps:
1. Install Microsoft Application Compatibility Toolkit 5.0 on a test computer. To download the Application Compatibility Toolkit 5.0, visit the following Microsoft Web site:
https://connect.microsoft.com/site/sitehome.aspx?SiteID=81

2. Click Start, type compatibility, right-click Compatibility Administrator in the results list, and then click Run as Administrator.
3. In the Analyze pane, expand Applications, and then click a program.
4. In the details pane, right-click the program for which you want to disable the fix, and then click Disable Entry.

Note This action creates a registry entry in the following registry subkey:
HKEY_LOCAL_MACHINE\SOFTWARE\Microsoft\Windows NT\CurrentVersion\AppCompatFlags
The name of the entry is the GUID that represents the program entry in the Appcompat database. The entry type is DWORD, and the entry has a value of 0x77.
5. Repeat steps 3 and 4 for all the program fixes that you want to disable.
6. Export the newly created registry entries to a .reg file. Then, deploy the .reg file to production computers.

Program Compatibility Assistant warnings
When you try to perform a silent installation or an automated installation of a program, the Program Compatibility Assistant may display a warning. Additionally, it may stop the installation. To allow for the automated installation of a program, you may want to disable this Program Compatibility Assistant warning.

How to disable a Program Compatibility Assistant warning

To disable a Program Compatibility Assistant warning, use a test computer to determine the registry keys to create. You can then use these registry keys to disable the Program Compatibility Assistant warning on other computers. To do this, follow these steps:
1. Run the affected program on a test computer.
2. When you receive the Program Compatibility Assistant warning message, click to select the Don't show this message again check box.

Note This action creates a registry entry in the following registry subkey:
HKEY_CURRENT_USER\SOFTWARE\Microsoft\Windows NT\CurrentVersion\AppCompatFlags
The name of the entry is the GUID that represents the program entry in the Appcompat database. The entry type is DWORD, and the entry has a value of 0x77.

Note The Program Compatibility Assistant warning appears only for a program that is not blocked from running.
3. Exit the program.
4. Note the registry entry that was created in step 3.
5. In the installation script, include steps to add the registry entry before the installation starts.

System requirment for Windows Vista

Author: Tom4u // Category: , , ,
Before you begin to install Windows Vista, make sure that you have everything that you need for the installation. Make sure that your computer meets the minimum system requirements to install and run Windows Vista. Also, determine whether you must perform an upgrade or a clean installation of Windows Vista. Use the information in this section to help you make these determinations.

System requirements

The following list describes the recommended minimum hardware requirements for basic functionality of the different editions of Windows Vista. Actual hardware requirements vary, depending on system configuration and on the programs and the features that you install. If you install Windows Vista over a network, additional hard disk space may be required.

Windows Vista Home Basic

• 800-megahertz (MHz) 32-bit (x86) processor or 800-MHz 64-bit (x64) processor
• 512 megabytes (MB) of system memory

Note On system configurations that use system memory as graphics memory, at least 448 MB of system memory must be available to the operating system after some memory is allocated for graphics.
• DirectX 9-class graphics card
• 32 MB of graphics memory
• 20-gigabyte (GB) hard disk that has 15 GB of free hard disk space
• Internal or external DVD drive
• Internet access capability
• Audio output capability
Windows Vista Home Premium, Windows Vista Business, Windows Vista Enterprise, and Windows Vista Ultimate

• 1-gigahertz (GHz) 32-bit (x86) processor or 1-GHz 64-bit (x64) processor
• 1 GB of system memory
• Windows Aero-capable graphics card

Note This includes a DirectX 9-class graphics card that supports the following:
• A WDDM driver
• Pixel Shader 2.0 in hardware
• 32 bits per pixel
• 128 MB of graphics memory (minimum)
• 40-GB hard disk that has 15 GB of free hard disk space (the 15GB of free space provides room for temporary file storage during the install or upgrade.)
• Internal or external DVD drive
• Internet access capability
• Audio output capability

Explanation of error codes generated by Device Manager in Windows XP Professional

Author: Tom4u // Category: , , , ,
SUMMARY
You probably reached this article because Device Manager reported an error code, and you are not sure how to resolve it. In this Post, we will help you find your error code and suggest what you might try to correct the error in the next post.

If you are using Windows Vista, or another operating system other than the Windows XP versions listed in the "Applies to" section, please contact Support. For information about how to do this, visit the following Microsoft Web site:
http://support.microsoft.com/contactus

MORE INFORMATION
This section lists the error codes and possible resolutions for the error codes. The error codes are listed in numeric order.

Before you continue, make sure that you have the error code available. You can view the error code in the device Properties dialog box available in Device Manager. You can also resolve many of the errors within Device Manager.

To start troubleshooting, follow these steps:
1. Make sure that Device Manager is open, and that the device that has the problem is selected. You can perform some recommended resolutions through Device Manager.
a. Right-click My Computer, and then click Properties.
b. Select the Hardware tab, and then click Device Manager.
c. Double-click the device type that has the problem. For example, if you have problems with your modem, double-click Modems to see the devices in that category.

A list of devices appears. If a device has problems, the device has a red exclamation point next to it. If a device is unknown (usually because of missing drivers), the device has a yellow question mark next to it.
d. Right-click the device that has the problem, and then click Properties. This opens the device Properties dialog box. You can see the error code in the Device status area of this dialog box.
2. Use the Troubleshooting Wizard, if it is available, to help you diagnose and resolve your problem.
a. On the device Properties dialog box, click the General tab.
b. Click Troubleshoot to start the Troubleshooting Wizard. The wizard asks you some simple questions and provides a solution to your problem based on the answers that you provide. If the Troubleshooting Wizard is not available, go to step 3.
c. Follow the resolution steps provided by the wizard to resolve the problem.
d. Check the Device status area of the device Properties dialog box to see whether the error is resolved. If the error is resolved, you are finished. Otherwise, go to step 3.
3. If the Troubleshooting Wizard did not help you resolve your problem or was not available, locate your error code in this article.

Note If you cannot locate your error code in this article, contact Support. For information about how to do this, visit the following Microsoft Web site:
http://support.microsoft.com/contactus
4. Follow the recommended resolutions for that error code.
• Check the Device status area of the device Properties dialog box to see whether the error is resolved. If the error is resolved, you are finished.

• If the problem still occurs, unfortunately, this article did not resolve your problem. For your next steps, you may want to ask someone for help. Or, you may want to contact Microsoft Support to help you resolve this problem

You receive a "Stop 0x0000000A" error message in Windows XP

Author: Tom4u // Category: , , , ,
INTRODUCTION
This article describes several causes and resolutions for a "Stop: 0x0000000A" error message that you receive either during or after the installation of Windows XP. This article is intended for advanced users.

SYMPTOMS
You receive a Stop error message with the following format during or after the installation of Windows XP:
Stop: 0x0000000A (parameter1, parameter2, parameter3, parameter4)
IRQL_NOT_LESS_OR_EQUAL
*** Address x has base at x - filename
In this Stop error message, each parameter is a hexadecimal number that refers to a specific issue:
• Parameter 1 - An address that was referenced incorrectly.
• Parameter 2 - An IRQL that was required to access the memory.
• Parameter 3 - The type of access, where 0 is a read operation and 1 is a write operation.
• Parameter 4 - The address of the instruction that referenced memory in parameter 1.
For example:
STOP 0x0000000A (0xBFD14AAC, 0x000000FF, 0x00000000, 0x8000F67C)
IRQL_NOT_LESS_OR_EQUAL
***Address 8000f67c has base at 80001000 - hal.dll

CAUSE

This Stop error message usually occurs during installation when there was an attempt in kernel mode to touch pageable memory at too high a process internal request level (IRQL). Typically, this error occurs when a driver uses an incorrect memory address. Other possible causes of this error include an incompatible device driver, a general hardware problem, or incompatible software.

RESOLUTION

When this Stop error message occurs, first try to resolve the issue by using the Windows Error Reporting tool that is automatically displayed when any error occurs. The Reporting tool sends an error report to Microsoft, and reports a fix or a workaround back to you immediately. If no fix or workaround is available, or if the fix or workaround reported by the tool does not resolve the error, then follow the methods in the "Advanced Troubleshooting" section.

ADVANCED TROUBLESHOOTING

This section includes two sections for advanced troubleshooting:
• If the error occurs during installation, go to the "Error occurs during the installation of Windows XP" section.
• If the error occurs after Windows XP is already installed, go to the "Error occurs after Windows XP is already installed" section.
You may find it easier to follow the methods if you print this article first.
Error occurs during the installation of Windows XP

If you receive a "Stop: 0x0000000A" error message during the installation of Windows XP, there might be a problem with the hardware components installed on your computer. First, make sure that your hardware is compatible with Windows XP by following the link in the "Make sure that your hardware is compatible" section. If your hardware is compatible, then follow the procedures to troubleshoot your hardware components in the "If your hardware is compatible, look for other hardware issues" section.
Make sure that your hardware is compatible
To verify that your hardware is compatible, make sure that it is listed on the latest Windows XP Hardware Compatibility List (HCL). Visit the following Microsoft Web site to view the list:
http://winqual.microsoft.com/HCL/Default.aspx?m=x (http://winqual.microsoft.com/HCL/Default.aspx?m=x)
If your hardware is not listed on the Windows XP HCL, consider obtaining hardware that is listed on the HCL. If you determine that your hardware is compatible, go to the "If your hardware is compatible, look for other hardware issues" section.

For more information, see the "Check System Compatibility" topic on the Windows XP installation CD or DVD to learn about potential software and hardware incompatibility.

If your hardware is compatible, look for other hardware issues
This section provides seven methods that you can use to troubleshoot and to isolate the issue by examining the hardware for potential problems.

Warning This article contains steps that may involve changing the BIOS or CMOS settings, or that may require you to make physical changes to your computer hardware. Incorrect changes to the BIOS of your computer can cause serious problems. Microsoft cannot guarantee that problems that are caused by changes to the BIOS can be resolved. Change the BIOS settings at your own risk. If you want help with any of these steps, contact the hardware manufacturer. Making hardware or BIOS changes to your computer may invalidate your warranty. If you do not want to make hardware changes to your computer, take your computer to a repair center.
Prerequisite
Make sure that you have the Windows XP installation CD or DVD available. The following methods require you to use the Windows XP installation CD or DVD to start the computer.
Suggested materials
Before you start the troubleshooting steps, you may want to have the following available:
• Support documentation for any added hardware, adapters, or devices
• Contact information for any added hardware, adapter, or device manufacturers

Method 1: Specify the Hardware Abstraction Layer (HAL)

Use this method first to try to resolve the Stop error message.
a. During the installation startup, press F5 when the "Setup is inspecting your computer's hardware configuration" message is displayed.
b. When you are prompted, make sure that you specify the correct computer type and Hardware Abstraction Layer (HAL). For example, if you have a single processor, specify the "Standard PC" HAL.
c. Try to reinstall Windows XP.
• If this resolves the Stop error message and you successfully install Windows XP, you are finished.
• If this does not resolve the Stop error message, go to method 2.

Method 2: Turn off features in CMOS settings

Use this method when method 1 does not resolve the Stop error message.
a. Turn off all the following features in the CMOS settings of your computer. For instructions, see the hardware documentation or contact the manufacturer.
• All caching, including L2, BIOS, internal/external, and writeback caching on disk controllers
• All shadowing
• Plug and Play
• Any BIOS-based virus protection feature

b. Try to reinstall Windows XP.
• If this resolves the Stop error message, go to step c.
• If this does not resolve the Stop error message, go to method 3.

c. Try to isolate which feature is causing the error. To do this, re-enable each of these features one at a time, and then restart your computer after you re-enable each feature.
d. If you identify a problem feature, disable or remove it and contact the manufacturer to try to resolve the issue.

If this does not isolate a problem with a CMOS setting, but this does resolve the Stop error message and you can start your computer normally, it may be that a setting was preventing the installation. If this is the case, turn on the setting after you install Windows XP, you are finished.

Method 3: Check the computer RAM

Use this method when method 2 does not resolve the Stop error message. If you need help performing any of the following steps, see the hardware documentation.
a. Remove any mismatched memory SIMMs (the RAM) so that all the SIMMs operate at the same speed. For example, 60 nanoseconds (ns) or 70 ns.
b. Run a systems test on the memory, and remove any bad SIMMs.
c. Test by using different SIMMs if any are available.
d. Try to reinstall Windows XP.
• If this resolves the Stop error message and you successfully install Windows XP, you are finished.
• If this does not resolve the Stop error message, go to method 4.

Method 4: Remove any adapters and disconnect any hardware devices

Use this method when method 3 does not resolve the Stop error message.
a. Remove all adapters and disconnect all hardware devices that are not required to start the computer or to install Windows. This includes the following adapters and devices:
• SCSI devices
• IDE devices
• Network adapter
• Internal modem
• Sound card
• Extra hard disks (you have to have at least one to complete the installation)
• CD drive or DVD drive (if you are installing from the local hard disk)

b. Try to reinstall Windows XP.
• If this resolves the Stop error message, continue to step c.
• If this does not resolve the Stop error message, go to method 5.

c. Try to isolate which adapter or hardware device is causing the error. After you reinstall Windows XP, reconnect each adapter or hardware device one at a time. Restart your computer after you reconnect each.
d. If this isolates a problem with hardware, disconnect the adapter or device and contact the vendor to try to resolve the issue.

If this does not isolate a problem with hardware, but this does resolve the Stop error message and you can start your computer normally, it may be that some hardware was preventing the installation. If this is the case, reconnect the hardware after you install Windows XP, and then you are finished.

For more details about this use and get computer help easily and quick
Unable to remove network printer drivers

Author: Tom4u // Category: , , , ,
How to fix network printer driver problem

The driver will still be loaded by the spooler after removing a printer from
the registry. One needs to stop (I assume you are here since the spooler
is not currently running) the spooler and restart after any registry change.
the print driver registry key for 32bit machines is located under.
HKEY_LOCAL_MACHINE\SYSTEM\CurrentControlSet\Control\Print\Environments\Windows
NT x86\Drivers\Version-3\PRINTDRIVERNAME

If the print driver uses a custom print processor it's sitting under this
location. You would need to look in the inf file that came with the printer
to know if it uses a custom print processor. Winprint is the print
processor that most inbox drivers use. Don't remove this entry. One
normally does not need to touch this key, just the driver.

HKEY_LOCAL_MACHINE\SYSTEM\CurrentControlSet\Control\Print\Environments\Windows
NT x86\Print Processors

Random error messages on a blue screen in Windows XP.

Author: Tom4u // Category: , ,
Error: Random error messages on a blue screen in Windows XP.

Error: When you run MS Windows XP, you may randomly receive an error message on a blue screen that references a bugcheck ID 0x0000008E (KERNEL_MODE_EXCEPTION_NOT_HANDLED) error.

Cause: This problem may occur when a program references an incorrect memory address.


Solution: A supported hotfix is now available. Only apply it to systems that are experiencing this specific problem.

Details: 1) To resolve this problem immediately, obtain the hotfix. Visit the following Web site:
http://support.microsoft.com/default.aspx?scid=fh;[LN];CNTACTMS

NOTE:T his hotfix may receive additional testing. Therefore, if you are not severely affected by this problem, Microsoft recommends that you wait for the next Windows XP service pack that contains this hotfix.

Symptoms: Error: Random error messages on a blue screen in Windows XP.

Keywords: Random error messages blue screen Windows XP

Applies To: PC Diagnostics for Windows XP

Audience: Support Analyst

Windows XP : How To Change the Refresh Rate Setting

Author: Tom4u // Category: , ,

Adjusting the refresh rate setting may be necessary to resolve screen flicker and other unstable display issues on monitors and other output devices like projectors.

Here’s How:

  1. Navigate to the Control Panel in Microsoft Windows by left-clicking on Start, followed by Settings and then choosing Control Panel.
  2. In the Control Panel window, open Display.

Note: Depending on how your operating system is setup, you may not see the Display icon. To correct this, click on the link on the left-hand side of the Control Panel window that says Switch to Classic View.

  1. In the Display Properties window, click on the Settings tab.
  2. Toward the bottom of this window, click on the Advanced button.
  3. In the resulting window, which may or may not be titled Plug and Play Monitor…, click on the Monitor tab.
  4. Locate the Screen refresh rate drop down box in the middle of the window. Under most circumstances, the best choice is the highest rate available. Depending on your issue though, the rate may need to be lowered.

Note: It is always recommended to keep the Hide modes that this monitor cannot display checkbox checked. Choosing refresh rates outside this range could damage hardware.

  1. Click the OK or Apply button to confirm the changes. If prompted, follow any additional on screen directions.

Resolve your technical issues with online computer support service providers

Author: Tom4u // Category: ,

Nowadays, computer support industry is booming like anything. As the statistic of computer enthusiasts is rising sharply, so is shooting up the demand in the industry for quality, economical computer support services.

A multitude of companies are dealing in computer support services and meeting the demands of high proliferation of computer enthusiasts. Besides computer repair, companies are also offering essential computer support that is needed by all computerized organizations, be them of any size or scale or at any location on the world map.

With Internet being a booming place for all tech savvies, these companies also strive to have a strong online presence. These resources generally offer a comprehensive array of computer support services for highly competitive rates. The existing cut throat competition in the industry has been further pushing the rates to be more competitive and services more specialized and proficient in nature than ever before.

Big computer makers like Apple, Microsoft, Dell, HP, IBM also run computer support services for their own manufactured models in more than one ways. These brands have their corresponding support centers across the international map. Their websites provide information on these support centers, user-friendly online help, FAQs, tips and tutorials. But, these support services are often highly expensive and cannot be afforded by general computer users.

On the other hand, general computer support providers offer extensive computer Help, including everything from computer set up/installation to troubleshooting, backup and recovery, battery related problems, brand components, performance and maintenance of computer and its connected devices.

Online computer support resources have highly trained technicians and computer engineers, who can resolve almost any PC related problems and hence extend satisfactory PC support to you. The spectrum of computer support services also includes online computer repair and maintenance.

These online vendors offer authentic support services to their customers. You can always check their websites and download these support utilities after registration. Furthermore, these resources offer high quality, affordable computer repair and home PC support.

You can also ask your online technical support technicians about tips and tweaks to make most of your computer.

How to repair Windows Registry hive Corrupted File

Author: Tom4u // Category: , ,

If your system gives the following Error massage “Your XP/2000 system displays the following error message: Stop error c0000218. Windows could not start because the following file is missing or corrupt: \WINDOWS\SYSTEM32\CONFIG\SOFTWARE” That means that the Software Registry Hive is corrupted. And you want to repair your and resolve these error follow the instruction given below It provided Computer Help to repair your computer.

.

1. Boot your system with the Windows XP/2000 Install CD, let the system start the Setup. Once in the Setup, choose to run the Recovery Console. Now type the following commands pressing Enter after each line.

md tmp
copy C:\windows\system32\config\software C:\windows\tmp\software.bak
delete C:\windows\system32\config\software
copy C:\windows\repair\software C:\windows\system32\config\software

Try to boot the system.

1.1 Zip the corrupted registry file .bak

2. If you don't have an XP/2000 CD with the Recovery Console on it, you can try removing your hard drive and connecting it your friend's system or installing another Windows system in a different directory. Then you can access the \Windows\System32\Config folder. Copy the files System, Security, Sam, Software and Default to a safe location. Then go to the \Windows\Repair folder. Those five files are your orginal registry files created when XP/2000 was first installed. Copy the file (with the name as the corrupted one) from the \Repair folder and paste it into the \Config folder.

Try to boot your system.

2.1 Zip the corrupted registry file.

3. Upload this file to us. Please wait until the 'The uploaded file has been successfully accepted by Willing Software' note appears.

iYogi Announces Launch of Monitoring and Performance Tool For SMBs

Author: Tom4u // Category: , , , ,
iYogi Announces Launch of Monitoring and Performance Tool For SMBs

iYogi – a leading provider of technical support services with horizons in the US, UK, Canada and Australia – today announced the launch of its exclusive server monitoring tool for small businesses. The new product offers integrated technology solutions to surmount the users’ unique IT support requirements thereby enabling them to derive and share information, data, enable network performance analysis, and security trends critical to plan and manage their set of servers – 24x7.


Uday Challu, iYogi’s CEO commented, “Holding a significant niche for itself in the computer support industry, iYogi has always known to be on the forefront of adapting breakthrough technology to exceed customer service expectations. This time we have developed a tool offering value-add functionality which will help small business customers maximize the business outcomes of IT.”


iYogi’s monitoring tool provides real time observation and monitoring solutions to ensure more robust and reliable IT infrastructure for small buinesses. Small Business owners also get a comprehensive assesment of their IT environment to meet technology needs with the scalability for future growth and create preventative measures based on quick analysis of network device alerts, pre-failure indicators, performance benchmark and security issues.


The new Monitoring and performance tool will provide small businesses with the opportunity to test all technical and non-technical aspects of their servers and help them to strengthen overall IT infrastructure. The array of services will include: Patch Management, Security Auditing, Site Inventory, Real Time Alerting Script Based Management, and Remote Management for all critical server issues.


“Irrespective of the business being small or large, when the consumer chooses iYogi, he leverages the potential of an elite taskforce of Microsoft Certified System Engineers and Cisco Certified Network Associates, ready to service their critical assets, using the most advanced network asset tracking and Performance monitoring”, adds Challu.


Another factor where the Company aims to distinguish itself from its competitors is product pricing. Embracing the concept of service quality, iYogi offers competitively priced technical support services at no-haggle, low prices.


As for its small business support, the Company has integrated its exclusive Monitoring and Alerting Services under one price umbrella of just $480 annually. per server i.e. $49.99 per month. The price is certainly hard to find anywhere else.


For more information on iYogi Small Business Support, visit http://www.iyogibusiness.com/


Contact Details:
Company Name: iYogi Technical Services Pvt Ltd
Address: iYogi Inc.12 Desbrosses Street3rd FloorNew York, NY 10013Toll Free no:1-800-237-3901Work Number: 1-212-229-0901Fax Number: 1-888-867-2715
E-Mail: awadhesh.singh@iyogi.net

iYogi Secures $9.5M in Series B Funding Led by SAP Ventures, With Follow-on Investment from Canaan Partners and SVB India Capital Partners

Author: Tom4u // Category: , , , , , , , , ,
New York, 24 July, 2008: Personal Offshoring, which is driving the next wave of India’s outsourcing success story, got a huge boost today when iYogi - a remote technical support provider from India - raised $ 9.5 million in Series B financing from SAP Ventures, a division of SAP AG, Canaan Partners and SVB India Capital Partners, a venture fund affiliate of Silicon Valley Bank.

iYogi (www.iyogi.net) delivers technical support services directly to consumers and small businesses and is the first, global, technical support brand based out of India. The company offers its customers an unlimited, annual service subscription for $119.99 per desktop that includes support for a wide range of technologies, including PC hardware Microsoft Windows operating system, software applications, peripherals and multifunctional devices.

Personal Offshoring has created new investment opportunities in India with incredible growth potential,” said Doug Higgins, partner at SAP Ventures. “It is very exciting to see companies like iYogi challenging the traditional enterprise-focused offshore-service delivery model by creating a consumer-focused, direct-to-customer personal offshore model. iYogi is one of the fastest-growing companies in this market segment, and we look forward to working with them to create India’s next success story.”

“Our focus on the customer experience has helped us achieve a 93 percent satisfaction rate across more than 50,000 customers,” said Uday Challu, CEO of iYogi. “We are delighted to have the support of three terrific investors as we increase our market share and continue to provide the best technical support experience possible for our customers.”
iYogi will use the funds to fuel its expansion into 12 new regions, including the United States, the United Kingdom and Canada, and to increase its delivery of new services including PC recovery, anti-virus/spyware, data back-up and PC optimization.

“As consumer technologies grow in sophistication, consumers will be seeking the kind of home IT support services – including remote services offered by companies such as iYogi – to help them solve their most complex problems,” said Kurt Scherf, vice president and principal analyst, Parks Associates. “In primary research, we found more than one-third of consumers are willing to pay for competent and professional remote support services, and 60% express a strong interest in software solutions – what we refer to as ‘PC Dashboards’ – that automate many basic PC performance enhancement and troubleshooting features, solving many PC-related problems before they even are noticed by end-users.”


iYogi had previously raised $3.1 million in Series A financing from Canaan Partners and SVB in April of last year. “iYogi is one of the most promising investments for Canaan Partners,” said Alok Mittal, managing director of India at Canaan Partners. “Third-party, vendor-independent technical support is an exciting new service category, witnessing explosive growth. Customers are looking beyond the traditional vendor-provided support to remote channels for better problem resolution, faster service, and greater overall satisfaction. iYogi has created an incredible value proposition and price offering for its customers that is hard to beat.”
”Several next generation outsourcing companies from India are delivering a range of personal offshoring services for individuals and small businesses in the U.S. including online tutoring, tax preparation, remote executive assistance and research services,” said Suresh Shanmugham, managing director of SVB India Capital Partners, a venture fund affiliate of Silicon Valley Bank. “iYogi has leveraged the technical skills available in India along with process expertise to scale as a global technical support provider for millions faced with increasingly complex technology”.


About SAP Ventures

SAP Ventures invests in innovative and disruptive software and services companies globally. We pursue opportunities across all stages for outstanding financial return. Our goal is to bring substantial benefit to all parties by facilitating interaction between portfolio companies and SAP and its ecosystem of customers and partners. SAP Ventures has a successful track record of building industry-leading companies by partnering with outstanding entrepreneurs and top-tier venture capital firms since 1996. For more information, visit www.sapventures.com.

About Canaan Partners

Canaan Partners is a global venture capital firm specializing in early-stage information technology and life sciences companies. Founded in 1987, Canaan Partners has $2.4 billion capital under management and has invested in more than 240 companies, completed 63 mergers and acquisitions, and brought over 50 companies public. The firm catalyzes the development of innovative mobile, Internet, CleanTech, networking, semiconductor, enterprise software and services, biotechnology and medical technologies to build next-generation market leaders. Canaan was an early investor in Acme Packet (APKT), Aperto Networks,
BharatMatrimony.com, Blurb, DoubleClick (DCLK), ID Analytics, Match.com and SuccessFactors, along with dozens of other market-leading companies. Canaan is headquartered in Menlo Park, California and also has offices in Connecticut, India and Israel. For more information visit: www.canaan.com.
SVB India Capital Partners Fund and Silicon Valley Bank
SVB India Capital Partners Fund is a $54 million equity fund that is focused on Indian companies and co-invests across industries and stages with top-tier venture capital firms. Silicon Valley Bank is the premier commercial bank for emerging, growth and mature companies in the technology, life science, private equity and premium wine industries. Founded in 1983 and headquartered in Santa Clara, Calif., the company serves clients around the world through 27 U.S. offices and five international operations. Silicon Valley Bank is a member of global financial services firm SVB Financial Group, with SVB Analytics, SVB Capital, SVB Global and SVB Private Client Services. More information on the company can be found at www.svb.com.
About iYogi

iYogi is the first direct-to-consumer and small business technical support service from India. Providing an annual unlimited subscription to technical support for $119.99 per year, iYogi now boasts more than 50,000 customers. The company employs 450 professionals servicing customers in the U.S., U.K., Canada fast expanding to 12 new geographies across the globe. iYogi’s resolution rate of 87 percent and customer satisfaction rate of 93 percent are amongst the highest published benchmarks in the industry. For further information, please visit www.iyogi.net.

# # #
SAP and all SAP logos are trademarks or registered trademarks of SAP AG in Germany and in several other countries. All other product and service names mentioned are the trademarks of their respective companies.

Any statements contained in this document that are not historical facts are forward-looking statements as defined in the U.S. Private Securities Litigation Reform Act of 1995. Words such as “anticipate,” “believe,” “estimate,” “expect,” “forecast,” “intend,” “may,” “plan,” “project,” “predict,” “should” and “will” and similar expressions as they relate to SAP are intended to identify such forward-looking statements. SAP undertakes no obligation to publicly update or revise any forward-looking statements. All forward-looking statements are subject to various risks and uncertainties that could cause actual results to differ materially from expectations The factors that could affect SAP's future financial results are discussed more fully in SAP's filings with the U.S. Securities and Exchange Commission ("SEC"), including SAP's most recent Annual Report on Form 20-F filed with the SEC. Readers are cautioned not to place undue reliance on these forward-looking statements, which speak only as of their dates.

The information contained herein is subject to change without notice. iYogi shall not be liable for technical or editorial errors or omissions contained herein.

SAP and all SAP logos are trademarks or registered trademarks of SAP AG in Germany and in several other countries.

All other product and service names mentioned are the trademarks of their respective companies.

Any statements contained in this document that are not historical facts are forward-looking statements as defined in the U.S. Private Securities Litigation Reform Act of 1995. Words such as “anticipate,” “believe,” “estimate,” “expect,” “forecast,” “intend,” “may,” “plan,” “project,” “predict,” “should” and “will” and similar expressions as they relate to SAP are intended to identify such forward-looking statements. SAP undertakes no obligation to publicly update or revise any forward-looking statements. All forward-looking statements are subject to various risks and uncertainties that could cause actual results to differ materially from expectations The factors that could affect SAP's future financial results are discussed more fully in SAP's filings with the U.S. Securities and Exchange Commission ("SEC"), including SAP's most recent Annual Report on Form 20-F filed with the SEC. Readers are cautioned not to place undue reliance on these forward-looking statements, which speak only as of their dates.

Press Contact Information

Vishal Dhar
awadhesh.singh@iyogi.net
1-212-229-0901
Company Name: iYogi Technical Services Pvt Ltd Address: iYogi Inc. 12 Desbrosses Street 3rd Floor New York, NY 10013 Toll Free no: 1-800-237-3901 Work Number: 1-212-229-0901 F ax Number: 1-888-867-2715 Mail Id: awadhesh.singh@iyogi.net

Tips On Buying A Computer Motherboard

Author: Tom4u // Category: , ,

The motherboard is the main circuit board of the system unit. You can say that motherboard is the master circuit board in the computer. Many new user of computer are not well aware about motherboard that is why for users planning on building a computer a motherboard can be a confusing decision. Below we have listed some considerations and tips when looking at purchasing a computer motherboard.

There are many factor of the motherboard is a crucial consideration when looking at a motherboard.

PC motherboard has two or more expansion slots used to add new components to the computer. The memory chips are also inserted into the expansion slot to expand the size of memory. Given option are very important in any motherboard for example:

Accelerator: It is used to increase the speed of processor.
I/O: It is used to connect input/output devices such as printer, mouse and keyboard.
Game: It is used to connect joystick.
Disk Controller: It is used to connect disk and CD drives.
Modem: It is used to connect other computers through telephone line or cable telephone line.
TV Tuner: It is used for viewing television channels on the computer monitor. It is used to increase the speed of processor.

Get PC Health Check if you face any kind of probelm with your Computer.

How Conditional Formatting is applied in Excel?

Author: Tom4u // Category:
A formatting that is applied to a cell or multiple cells and activated only if condition is met is called conditional formatting. For example, if a condition is applied in a selection that when any value in the selection is greater than 100, the value in the respective cell will be bold. In figure below, the conditional formatting is applied to the cells C3 to CIO. When values in these cells are changed, Excel automatically updates the format of the cell's.


In conditional formatting, you have to specify a condition or criteria for formatting. The criteria is specified in the Conditional Formatting dialog box.


To apply the conditional formatting, follow the steps.

  1. Select the cell's, you want to apply conditional formatting.
  2. Choose Conditional Formatting command from the Format menu. The Conditional Formatting dialog box will appear as shown below.
  3. Specify the condition.
  4. Click Format button to apply formatting. Format Cells dialog box will appear. Specify the format you want.
  5. Click Add button to specify another condition. You can specify up to three different conditions.
  6. Click OK.

To delete the conditional formatting, follow these steps.

  1. Select the cell's, you want to delete the conditional formatting.
  2. Choose Conditional Formatting command from the Format menu. The Conditional Formatting dialog box will appear.
  3. Click Delete button to remove a condition. You will be asked to choose which condition (1, 2 or 3) you want to remove.
  4. Select the condition and click Ok button.

source:computerfreetips.com

Tips On Buying a Printer

Author: Tom4u // Category: , , , ,
These are most commonly used output devices used to get prints of documents on the pager. Different printers have different mechanisms. Therefore purchasing a printer can be a sometimes confusing task. The following is additional information that will help in your purchasing decisions.

Technology of printers

There are many types and technology of printer are available in market but the most popular and commonly used are inkjet and laser printer.

Ink Jet Printer. The inkjet printer is not-impact character printer and prints one character at a time. The printing quality of inkjet printer is measured by the number of tiny ink of drops per inch(dpi). Most inkjet printers range from 300 to 2400 dpi. Printers with higher dpi usually are more expensive but having high printing quality. The speed of an inkjet printer is measured by the number of pages per minute (ppm) it can print. Its printing speed is up to 15 ppm. Therefore purchasing a printer can be depends upon printers dpi and ppm but It depends upon user need.

Laser Printer. A Laser printer is the fastest and high quality printer, but a laser printers are more expensive than inkjet printers and their print quality is also higher. The print quality and printing speed of laser printers make them ideal for offices and business. The laser printer can print text and graphics in very high quality resolution. The commonly user laser printers have resolution of 300 or 600 dpi and printing speed is from 5 to 30 ppm. The high quality laser printers have resolution from 600 to 2400 dpi. The printing speed of these printers is also more than 150 ppm.

Speed and price range

The price of laser printers depend on the quality and printing speed. The color printers are more costly than black-and-white laser printers. The higher the resolution and speed, the more expensive the printer.The price range can vary depending upon the quality of the printer and the type of printer for example inkjet, laser printers.

If you face any kind of probelm with your printer then go for Printer Help

source:computerfreetips

How to convert digit list into Roman numerals automatically?

Author: Tom4u // Category: , ,
In Microsoft Excel, you can covert the digits list into Roman format automatically. MS Excel allows you to perform conversion by using a mathematical formula. The sentence structure for the Roman function is:

Roman( number, type )

Here number is the any specific digit or cell number that you want to perform conversion to roman and type is optional operator. Roman function will generate error message if you will try to enter here any negative number or values greater than 3999.

To apply a roman formula to MS Excel document, follow the given steps:

First click on Start button, go to Program then click on Microsoft Excel to open a new excel page.

Now enter any list of numbers in cell A1 to cell A15. In this example we are trying to insert any 15 numbers.

Here select the cells B1:B15 and then insert the Roman function =ROMAN(A1) in formula bar.

Now press "Control+ Enter" button to apply this formula to selected areas.

If you are facing any kind of computer problem the go for Technical Support

source:computertipsfree.com

How to configure speech recognition in Microsoft Office XP ?

Author: Tom4u // Category: , ,
Microsoft Office XP has working with built-in speech recognition features. The main purpose of this feature to understand the speech and then coverts to text file. You can run this feature in any Office XP applications, for example Microsoft Excel or Microsoft Word.

Follow the give steps to install the speech recognition features in office XP:

1.First click on Start button, go to Control Panel then click on Add or Remove Programs.

2. Now find and select the "Microsoft Office XP Professional with FrontPage" option in Add or Remove Programs list, then click on Change button.

3. Here select the option "Add or Remove Features" Change which features are installed or remove specific features", and click on Next button.

4. Here expand the "Office Shared Features"> Alternative User Input > Speech. Now click on Speech option and select "Run from My Computer" from menu and click on Update button to start installation process.

Now system will takes some time to install this feature.

After you have installed, open Microsoft Word > Tools > and click on Speech option.

Now click Next on welcome page.

If you are running it first time, then system will ask you for voice training, you can skip it but the voice training increase the chance of accuracy.

If the training is over, now try to speak "File" to open the File menu and check speech recognition feature has been working or not.

If you are facing any kind of problem with your computer then go for Computer Repair

How to enable Autosave feature in MS Excel ?

Author: Tom4u // Category: , ,
Microsoft Excel includes a powerful feature of saving your document automatically after some specified time intervals. By default, Excel automatically saves your current document after every ten minutes intervals but you can change this time. This Auto save feature save the data in the same file. However, AutoSave protects your data in the event that Excel unexpectedly quits. It is also good idea to create a backup of your files using any removable devices, because in this global network a computer can crash, a virus create problem, or a hard drive failure can wipe out everything.

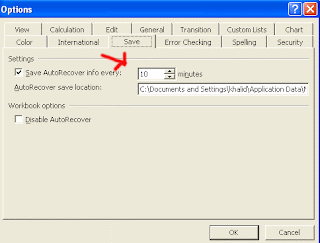
Follow the given steps to change default save time and enable auto backup feature:


A small dialog box will open, here select the Save tab in the dialog box.


Now click the "Save AutoRecover info every" check box and enter the time in minutes under "Settings" area.


Here you have choice to modify the location of saving your document automatically under "AutoRecover save location" option.Click the Ok button of dialog box to finish the process.

source:computerfreetips.com

Views document with different styles in Word

Author: Tom4u // Category: , ,
You can display document in different views in document window. When you switch from one view to another, the document contents are not affected and only the layout of the document is changed. A Microsoft word document can be viewed in four different ways.

You can select a view form the View menu or by clicking their respective icons located at the leftmost section of the horizontal scroll bar. The document views are described below.

Normal View

In normal view, only the text and the text formatting is viewed. The headers &footers, graphics or layout of the page is not shown. This mode is used to type and edit text quickly.

Web Layout View

In Web layout view, the document is viewed on the screen as it would be appeared in the Web Browser. This mode is used if you want to create a Web page or document in MS Word and save it as Web page.

Print Layout View

In Print layout view, the document is viewed on the screen as it would be printed on the printer. The headers &footers, graphics etc. are also viewed in this mode. This view is useful for editing headers& footers, for adjusting margins, and drawing objects etc. This mode is very slow for creating and editing documents.

Outline ViewIn outline view, the structure of the document is displayed. The structure of document may include main headings or you can expand it to see all headings and even body of text. In this view, page boundaries, headers footers, graphics and background are not appeared. This view makes easy to work with master document. A master document is used to organize and maintain a long document, such as a multipart report or a book with chapters.

If you are face any kind of computer problem the go for Computer Repair
source:computerfreetips.com

Microsoft Office XP working with built in speech recognition features.

Author: Tom4u // Category: , , ,
Microsoft Office XP has working with built-in speech recognition features. The main purpose of this feature to understand the speech and then coverts to text file. You can run this feature in any Office XP applications, for example Microsoft Excel or Microsoft Word.

Follow the give steps to install the speech recognition features in office XP:

First click on Start button, go to Control Panel then click on Add or Remove Programs.

Now find and select the "Microsoft Office XP Professional with FrontPage" option in Add or Remove Programs list, then click on Change button.

Here select the option "Add or Remove Features" Change which features are installed or remove specific features", and click on Next button.

Here expand the "Office Shared Features"> Alternative User Input > Speech. Now click on Speech option and select "Run from My Computer" from menu and click on Update button to start installation process.

Now system will takes some time to install this feature.

After you have installed, open Microsoft Word > Tools > and click on Speech option.

Now click Next on welcome page.

If you are running it first time, then system will ask you for voice training, you can skip it but the voice training increase the chance of accuracy.

If the training is over, now try to speak "File" to open the File menu and check speech recognition feature has been working or not.

If you face any kind of problems with you computer then go for Computer Repair

source:computerfreetips

How to add Header/Footer in your PowerPoint presentation?

Author: Tom4u // Category: ,
In Microsoft Power Point, you can use the option "Header and Footer" to add the repeated information (for example reference note, data, time, slide number) in the main slides. This tip is very useful, when you want to add slide reference note on every slide in your presentation.

erform the given procedure to add header/footer in PowerPoint presentation:

From View menu select "Header and Footer" option, a small dialog box will appear with the title "Header and Footer".

Select "Slide" tab, now you can select "Fixed", "Date and time" option or select "Update automatically Date and time under "Include on slide" section.

To add the number, check the "Slide number" option, and to add footer, select "Footer "checkbox and type text that you want to appear as slide footer.

Click on Apply button to save "Slide" tab settings.

Under "Notes and Handouts" tab, you can select also "Header" with all "Date and time" and "Footer" options.

Once you have selected the all required options, click on "Apply to All" button to save all settings.

If you face any kind of problems with you computer then go for Computer Repair

How to perform automatic Saving & Backup of your Word file?

Author: Tom4u // Category: , ,
Microsoft Word also has an important feature of saving your work automatically into the current document after specified time. By default, word automatically saves your current document after every ten minutes but you can change this time. It is also good idea for you to create backup of your files automatically. Because in this global network a computer can crash, a virus problem, or a hard drive failure can wipe out everything.

Follow the given steps to change default save time and enable auto backup feature:

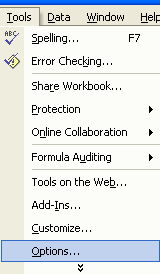
First choose Options command from Tools menu.
A small dialog box will open, here select the Save tab in the dialog box.
Check the option "Always create backup copy" to set your word to create backup copy of file each time, you save document. Word saves this backup copy in same folder as your original document with .wbk extension.
Now click the "Save AutoRecover info every" check box and enter the time in minutes.
Click the Ok button of dialog box to finish the process.

If you face any kind of problem in microsoft word then go for Microsoft Help.

Tips to add Picture into Header/Footer in Excel?

Author: Tom4u // Category: , , , , , ,

In MS excel header and footer option is used to display the repeated graphics or text on the top or button of each pages in a document. You can insert a picture (company logo or other related picture) in the bottom or top margin of each page. For reference, you can add the data, time and path for where you saved excel file on your computer or on any network server. Both the header and the footer are displayed in print layout view and save your time to enter the same items in pages again and again. You can use the same header and footer throughout a document or change the header and footer for part of the document.

You can leave the header or footer for the first page and can also use different headers and footers on odd and even pages or for part of a document.

To apply header or footer, follow these steps.

Select "Header and Footer" from View menu, "Header and Footer" Floating Toolbar will appear. The header and footer sections of document are also activated.

Now under Header/Footer tab, click on Custom Footer button then select left section.

To insert the picture, click on Picture icon (the 2nd icon from the right side) to select the company logo that you want to add.

Select other options if required, for example you can add date, time file name and file path also.

Now click Ok button to finish the process.

If you face any kind of problems with you computer then go for Computer Repair

How to packaging your PowerPoint presentation to CD?

Author: Tom4u // Category: ,
In Microsoft PowerPoint 2003, you can copy a presentation on to CD with all its supporting materials using "Package for CD" option. With this feature, you can merge the whole presentation components (pictures, music, charts, fonts and other graphics) as a single file so that you can run this presentation on another computer even if PowerPoint is not installed. This package file will useful for presentation backup and easy to transfer from one computer to other computer. In previous version of PowerPoint, the name of this feature was "Pack and Go".

Follow the given steps to create CD package for PowerPoint Slides:

1. First of all click on "Package for CD" option from the "File" menu, a small dialog box will appear with "Package for CD" title.

2. Now type the CD name in the "Name the CD" box.

3. Using same dialog box, click on "Add Files" button to add actual presentation file.

4. Click on "Options" button to explore more choices. Here you can include linked file, Embedded TrueType fonts and also set password so that unauthorized person can not display as well as modify your document.

5. Now if you are using windows 2000, click on "Copy to Folder" button to save this package on hard disk and then write it on CD. However if you are using windows XP, click on "Copy to CD" button and then your package will directly write to a blank CD.

6. After you have selected the necessary options, click on Ok button to transfer PowerPoint file and then close Package for CD dialog box to finish it.

If you face any kind of problems with you computer then go for Computer Repair

source:computerfreetips

Acrobat Reader shortcut keys with detail

Author: Tom4u // Category: , , , ,
Function keys

F1 - Use to give the help of any windows panel
F3 - Use to Find next search result
F5 - Apply to select the document list panel
F6 - Use to open/close the document list panel
F8 - use to view/close main tools bar list
F9 -use to view/close main menu bar
F10 - Use to select the main menu bar
Ctrl+F4 - Use to close the current file
Ctrl+F6 - Move through next open document
Ctrl+Shift+F6 - Move back to open document
Shift+F3 - Use to Find previous search result
Shift+F6 - Select the previous open page
Shift+F8 - Use to select main tools bar list
Shift+F10 - Press keys to open context menu


Shortcut keys

Up Arrow Button - Scroll up the active document
Down Arrow button - Scroll down the active document
Ctrl+Hyphen - Use to Zoom out the active page
Ctrl+equal sign (=) - Use to Zoom in the active page
Alt+Right Arrow button - Use to Next view
Alt+Left Arrow button - Use to previous view
Right Arrow button - Move to next page in active document
Left Arrow button - Move to back page in active document
Page Up - Move to the previous screen
Page Down - Move to the next screen
Ctrl+Shift+W - Apply to close all open windows
Ctrl+Spacebar+click on active page - Zoom the active page for temporarily
Ctrl+Home - Go to home page of document
Ctrl+End - Go to last page of document
Ctrl+A - Use to select the all pages
Ctrl+Shift+A - Use to deselect the all pages
Enter - Scroll down the pages
Ctrl+0 - Use to adjust the document
Ctrl+1 - Use to view actual document size
Ctrl+Q - Quit the active document
Ctrl+L - To view the document in full view
Ctrl+Shift++ - Move the page clockwise
Ctrl+Shift+- - Move the page counter clockwise

If you face any kind of problems with you computer then go for Computer Repair

Print Envelopes and Labels in Word

Author: Tom4u // Category: , , , ,
Word provides a suitable way to print envelopes and labels. You can print mailing and return addresses on an envelope, or addresses on a mailing label.

To create and print an envelope, follow these steps.

1. Choose Envelopes and Labels from the Tools menu. The Envelopes and Labels dialog box will appear as shown below.
2. Click the Envelopes tab to display options of Envelopes.
3. Enter (or Edit) the mailing address in the Delivery address box.
4. Enter (or Edit) the return address in the Return address box Or select the Omit check box to omit a return address.
5. Click Options button to specify the envelope size, the type of paper and other options. Click "Add to Document" button to add or attach the envelope to the current document for later printing or editing.
6. Click Print button to print the envelope.


You can also add graphics to the return address of your envelope. To add graphic, follow these steps.

1. Select mailing address in the document.
2. Open the Envelopes and Labels dialog box.
3. Click Add to Document (or Change Document) button.
4. Click the Page Layout view icon in the Status bar.
5. Insert or create the graphic in the document.
6. Position the item on the envelope.

If you face any kind of problems with you computer then go for Computer Repair

How to convert word files into PDF?

Author: Tom4u // Category:
You can convert your reports, spreadsheets and any word files into Adobe Portable Document Format (.pdf). There are many free and paid software’s available to convert normal files into .pdf, for example you can download “Universal Converter Software” free trail. Using this converter you can convert your web pages, emails, books any others important documents into .pdf.


Benefits of .PDF


PDF files are platforms independent, for example if you are creating your resume in Microsoft windows, and you obviously wants that your resume look the same on all platforms, whether computer has Mac, Linux and Microsoft windows. PDF is the great way to send your important documents to others in same and secure ways.


PDF can not be modified in text or formatting in new style without your permission. Internet users prefer the .pdf format because they can download it easily in Adobe Reader.


Fellow the given steps to convert word file into PDF.


1. First download the “Universal Converter Software” and install onto your computer.
2. Now open any word document and press the File and then click on Print option to open printer dialog box.


3. Here select the “Universal Document Converter” from the printer list and press Properties button to select the “Document to PDF, Color, and Multipage” profile.

4.


5. Now press the Ok button to start the converting process into PDF.

If you face any kind of problems with you computer then go for Computer Repair

Useful Microsoft Outlook Shortcut keys

Author: Tom4u // Category: , , , ,
Shortcut keys

Ctrl+A - Apply to select all
Ctrl+B - Apply/Remove bold formatting
Ctrl+C - Apply to copy the selected word
Ctrl+D - Apply to delete any active item
Ctrl+E - Move cursor to Look for box
Ctrl+F - Display the Find what /Forward selected email
Ctrl+G - Apply to run Go to dialog box under calendar view
Ctrl+I - Apply/Remove Italic formatting
Ctrl+J - Apply to open selected items
Ctrl+M - Press keys to create new message
Ctrl+N - Press keys to send new email message
Ctrl+O - Press Keys to open new file
Ctrl+P - Press Keys to display Print dialog box
Ctrl+Q - Apply to set email as read
Ctrl+R - Press Keys to replay selected message
Ctrl+S - Save the active file
Ctrl+U - Press Keys to apply/remove underline
Ctrl+V - Press Keys to paste the clipboard values
Ctrl+X - Press Keys to cut the selected word
Ctrl+Y - Press Keys to run Go to Folder
Ctrl+Z - Apply to undo the previous command
Ctrl+1 - Press keys go to Mail
Ctrl+2 - Press keys go to Calendar
Ctrl+3 - Press keys go to Contacts
Ctrl+4 - Press keys go to Tasks
Ctrl+5 - Press keys go to Notes
Ctrl+6 - Press keys go to Folder List
Ctrl+7 - Press keys go to Shortcuts
Ctrl+8 - Press keys go to Journal


Function keys

F1 - Use to open help of any windows panel
F3 - Move cursor to Look for box
F4 - Use to display Find dialog box
F6 - Apply to select item in active window
F7 - Use to check spelling in active window
F9 - Use to receive and send email
F10 - Use to select the main File menu bar
F11 - Apply to activate Find a Contact dialog box
F12 - Use to run Save As dialog box.

If you face any kind of problems with you computer then go for Computer Repair

Tips Indenting Left and Right Paragraph

Author: Tom4u // Category: , , , ,

The space or distance between the page margin and the text in a paragraph is called indent. These are applied to set the margins of selected paragraph.
In a document, margins determine the overall width of the main text area or in other words, the space between the text and the edge of the page. Indentation determines the distance of a paragraph from either left or right margins. There are six types of indents that can be used in a document. These are:

1. First line indent is the distance between the first line of the paragraph and the left margin.


2. Left indent is the distance between the start of each line of the paragraph and the left margin.


3. Right indent is the distance between the end of each line of the paragraph and the right margin.


4. In hanging indent, the first line of the paragraph is not indented and all other lines start at same distance from the left margin. The first line 'of the paragraph usually starts from the left margin.


To indent a paragraph, follow these steps:-


1. Select the Paragraph you want to indent.

2. Select the "Paragraph" command from "Format" drop down menu; "Paragraph" dialog box appears.

3. Specify values in Left and Right fields of indentation and click "Ok" button of dialog box.

If you face any kind of problems with you computer then go for Computer Repair

Top Tips for Protecting Document with Password

Author: Tom4u // Category: , , , , ,
You can protect your document by applying password so that unauthorized person can not display as well as modify your document. You can apply two types of passwords:

Password to open the document:

If it is applied then you have to give the correct password to open the document, otherwise you cannot open the document.

Password to modify the document:

If it is applied then you have to give the correct password to modify the document, otherwise your document is opened but you cannot modify the document. It means that your document becomes read-only.

To apply a password to document, follow these steps.

* Open Save As dialog box by selecting "Save As" command from File menu.

* Click "Tools" button of Save As dialog box and choose "General Options" from drop down menu, "Save" dialog box appears as shown in figure below.

* Enter first password in "Password to open" text box and second password in "Password to modify" text box (if required) and click "Ok" button of dialog box. Microsoft Word will open "Confirm Password" dialog box for the confirmation of passwords. The maximum length of password is 15 characters.

* Re-enter the password to open and password to modify and click "Ok" button of Confirm Password dialog boxes one by one.

* Click "Save" button of Save As dialog box.
If you face any kind of problems with you computer then go for Computer Repair
source: computerfreetips.com

Top Tips for Studying for Microsoft Office

Author: Tom4u // Category: , , , ,
Studying for Microsoft Office is not all that difficult if you know where to start. However, most people are clueless at first and need some direction or at the very least some tips to help them study for Microsoft Office. The following tips will help you with your MS Office training.

Tip 1

Start EarlyWhen it comes to Microsoft Office training you want to start early rather than waiting until the last minute. The reason why is because it takes time to learn all you need to learn and you want to take your time absorbing the information and really learning it. If you wait until the last minute to study you may learn enough information to pass the exam but it is unlikely you will have really learned the information.

Tip 2

TutorialsA great way to learn is to use a Microsoft Office tutorial. The tutorial will walk you through the steps you need to follow in order for you to learn everything necessary about Microsoft Office You can use the Microsoft Office tutorial CD to focus on what is necessary and what is not. You will be able to learn in a focused manner which is really important and it will prepare you for the exam.

Tip 3

Practice TestAnother good idea to help you study for Microsoft Office certification is to take practice tests online. Doing this will give you a good idea of how prepared you are and what areas you still need to focus on. Sit down with a timer and start taking a practice test. Then evaluate your score. Doing this will give you a realistic idea of whether you are prepared for the Microsoft Office exam or not.

These are just a few tips to help you study for Microsoft Office. There are of course many other ways you can study for your Microsoft Office certification and you know your study methods best. However, what is most important is that you are prepared for exam and that you put forth all of your efforts in order to pass the test the first time around. By not studying the way you should you could easily fail the test and would have to take it again wasting your precious time and money. So, follow the tips outlined here and you will be prepared for your Microsoft Office exam.

If you face any kind of problems with you computer then go for Computer Repair

The Smart Way to Master Microsoft Excel

Author: Tom4u // Category: , , , ,
Microsoft Excel is a spreadsheet and data storage software program that is an important part of the business management process in many organizations. An ability to understand this program and to work with it is essential for all levels from entry to top management. Many organizations list being able to use Excel as a requirement for employment. The ability to master this useful program will benefit anyone involved in business from a job applicant to the CEO of the company.

Excel training exists at many levels also. The software itself includes tutorials designed to get you started. The Microsoft website offers additional training software that is also intended to give a user at least a working knowledge of Excel. For many people, this is as far as they take their training and as a result they both struggle with Excel and fail to realize or utilize its tremendous potential. If you want to get the most out of it, you need to accept its complexity and recognize the need for some serious training. If you are able to reach the point where you can truly say you have "mastered" Microsoft Excel, you will have a leg up on the competition both within and outside of your company.


Microsoft Help or training is offered through a worldwide network of Microsoft Certified Learning Partners. These organizations have passed rigorous Certification examinations administered by Microsoft. There are more than 26,000 Learning Partners in this network. Training is administered in two different manners. There is classroom based training and distant learning. These two methods have become a common choice in most computer based training and educational programs in the last decade. Each individual must evaluate his own situation taking into consideration his budget, his schedule, and his own ideal learning style to make a decision about which is better for him.

Microsoft Excel training is offered by either group. The Microsoft Certified Partners for Learning Services (MCPLS) offer comprehensive hands on instructor led training at sites spread widely over the world. A directory on the Microsoft Excel training home site can guide you to a MCPLS facility in your area. Microsoft Official Distant Learning (MODL) partners provide training platforms that can be delivered directly to your own computer. They provide the back up and technical support needed to complete the training and maximize its results.

It is possible to delve into Microsoft Excel if you have any knowledge or familiarity with spreadsheet applications, but this approach ignores the potential and only skims the surface of what Excel can do for you and your organization. The smart way to master Excel and get the most out of it is to take some formal Excel training from a Certified Partner.


If you face any kind of problems with you computer then go for Computer Repair